

IBC Tank Factory: A Behind-the-Scenes Look at Production and Quality Control
2026-10-16
Walk into any chemical plant or food processing facility and you'll see rows of IBC tanks doing the heavy lifting. But few people pause to ask how those tanks are actually built. At DYE's IBC tank factory, the answer is a mix of precision engineering and relentless quality control—and this behind-the-scenes look shows you exactly what happens before a tank ever leaves the floor.
The Polymer Arrives: Unloading, Drying, and First Checks
The truck backs into the bay just after dawn, and the polymer sacks are offloaded with more care than the cardboard boxes that share the dock. Each pallet gets a quick visual once-over before it clears the doorway—torn wrapping, damp corners, or a shifted load are all reasons to stop and take photos before accepting the shipment. A forklift moves the material into a staging area where the lot number is checked against the purchase order and the first samples are pulled for moisture testing.
Drying is where most early problems start, so it gets its own rhythm. The pellets go into a desiccant dryer set a few degrees below the resin supplier’s ceiling, and the actual dew point and air flow are logged every shift rather than assumed. It is tempting to rush this step when production is waiting, but under-dried polymer shows up later as splay, brittleness, or weak weld lines. Once the target moisture content is reached, a small batch is molded or extruded and held up to the light for surface defects before the full lot is released to the line.
Inside the Molding Cell: Heat, Air, and Split-Second Timing
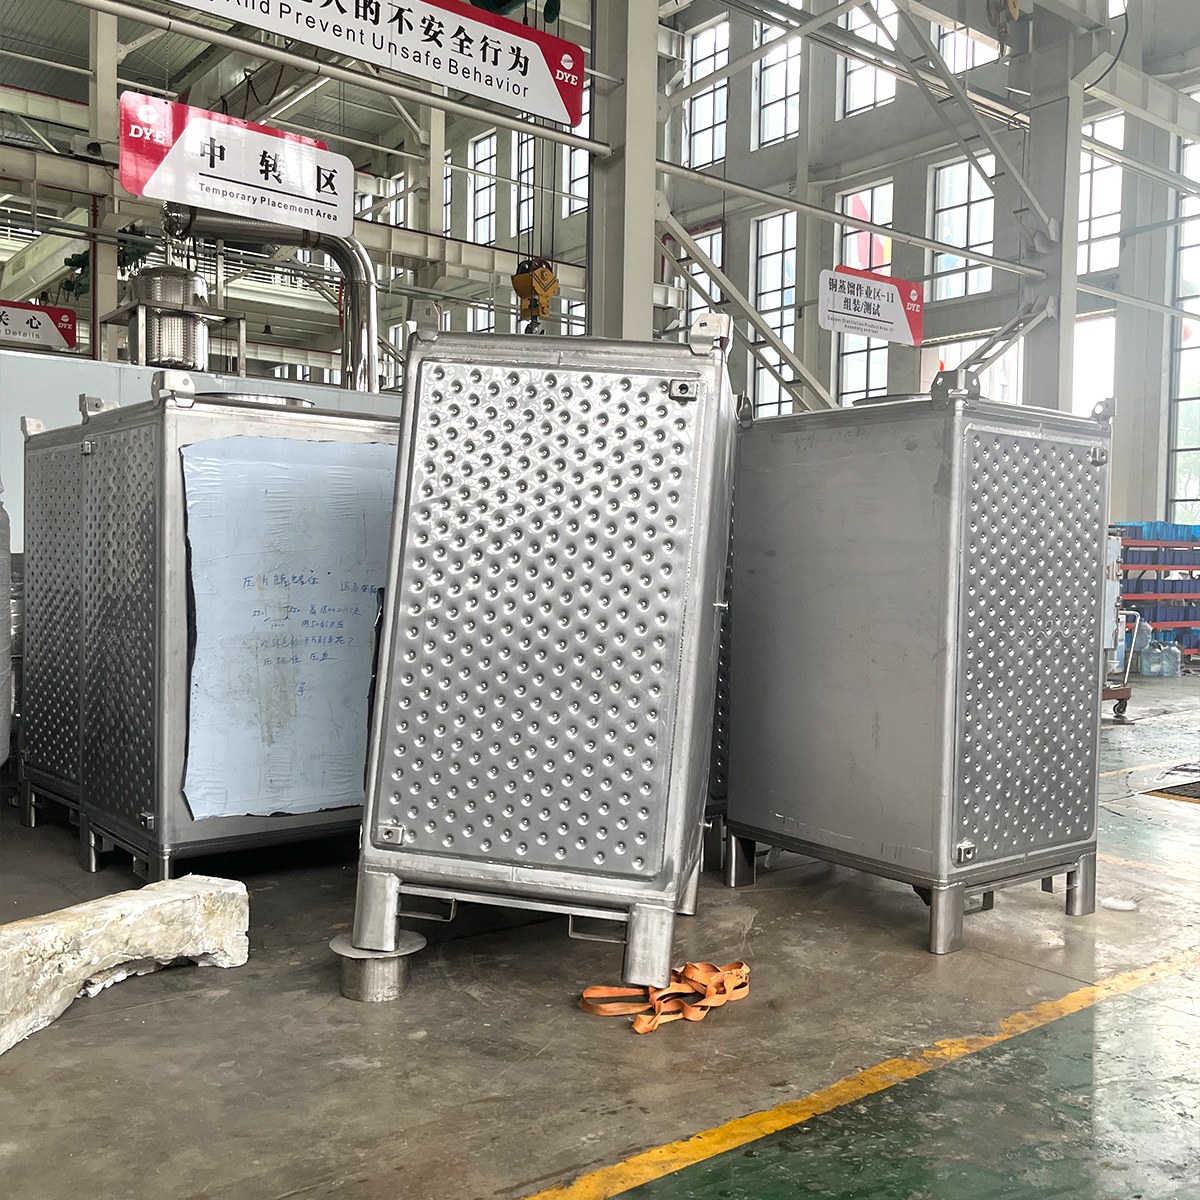
The heat inside a molding cell is rarely steady. Barrel heaters cycle in short bursts, mold faces swing between 80 and 140 degrees depending on the resin, and every surface holds memory of the last shot. Operators learn to read the air shimmer above the clamp before the press even opens.
Air does more than cool. It trips ejector valves, sweeps the parting line clear of flash, and dries the micro-vent grooves that keep gas from blistering the part. A ten-degree drift in the air manifold can turn a glossy surface hazy, so the lines feeding each zone are tuned like small instruments.
Then comes the timing. The mold closes, the screw bottoms out, and hold pressure must engage within a window no wider than a camera flash. Half a second too early, the gate freezes; too late, and the part stretches thin where the sensor can't see it. That split-second sync is what separates a stable run from an afternoon of scrap bins.
Automated Assembly: Robots, Jigs, and Human Oversight
On a modern assembly floor, robots no longer simply replace human hands—they take over the tasks that punish joints and patience. Precision welding, adhesive dispensing, and high-cycle pick-and-place operations fall to six-axis arms while jigs, once static steel cages, evolve into active fixtures with pneumatic clamps and locator pins that reposition the part mid-sequence. The linchpin is not the robot’s repeatability but how well the jig maintains datum points under vibration and thermal drift.
Human oversight shifts from brute force and pace-keeping to exception handling. Operators read torque curves and force signatures on dashboards, stepping in only when a gripper slips or a vision system flags a misaligned bracket. That judgment layer is hard to automate: recognizing the difference between a smeared barcode and a genuinely defective casting often comes from years on the line, not from training data.
The real differentiation appears in changeover. Instead of dumping a robotic cell for every product variant, teams now design modular end-of-arm tooling and quick-release jig plates so a single line can shift from dashboard subassemblies to door modules in under twenty minutes. It’s less about lights-out autonomy and more about flexible, supervised automation that keeps human intuition close to the process without making it the bottleneck.
Leak Testing and Load Simulation: Proof Before Paint
In body shops and production lines, the sequence matters more than most people realize. Running leak tests and load simulations before any primer or topcoat touches the surface means structural weaknesses, pinholes, and weld porosity show up while they can still be fixed quickly. Once paint seals a flaw, detection gets harder and repairs get expensive.
Leak testing typically uses pressurized air, tracer gas, or vacuum decay to spot tiny breaches that visual inspection will never catch. Cabin shells, battery enclosures, and fluid-carrying components are pressurized and monitored for pressure drop; any unexpected loss points straight to a suspect seam or joint. Done at this stage, a failed test doesn’t scrap a painted part—it just sends the piece back for rework before finishing.
Load simulation adds another layer of proof. Fixtures apply twisting, stretching, or vibration that mimics real-world stress, making sure the structure doesn’t crack or shift under expected use. Combining that with leak testing before paint gives a raw, honest read of the part’s integrity. The payoff is fewer warranty claims and a cleaner line, because problems are caught while the metal is still bare and forgiving.
The Lab's Stress Menu: Chemicals, UV, and Drop Tests
Chemical exposure doesn't follow a single script, so the stress menu runs samples through everything from corrosive salt fog and industrial solvents to concentrated cleaning agents and acidic rain simulants. A test might start with a splash of acetone, move to a 5% NaCl mist for 48 hours, then finish with a wipe-down using isopropyl alcohol and a visual check for cracks, blisters, or discoloration. Timing matters as much as chemistry: some materials fail in minutes under toluene, while others shrug off a week in sulfuric acid but turn brittle after a single cold ethanol rinse.
The UV chamber adds another layer of punishment by cycling between intense UVA-340 lamps and dew cycles that mimic morning condensation. Rather than blast a sample with constant light, the program alternates 8 hours of dry irradiation with 4 hours of dark humidity, which stresses the polymer network through repeated expansion and contraction. Technicians track color shift with a spectrophotometer and flex the panels until microcracks appear, because gloss loss often shows up long before mechanical failure does.
Drop tests look straightforward until you realize a phone rarely hits the floor the same way twice. The lab uses a guided impact tester that can adjust height, angle, and strike surface—polished steel, concrete, even a sheet of glass—to reproduce real-world accident patterns. Samples get conditioned at -20°C or 60°C before the drop, since a polymer that survives at room temperature may shatter when frozen or soften and bounce when hot. Each impact is logged with a high-speed camera so that the exact moment of crack initiation can be separated from cosmetic scuffs.
Final Walk-Through, Pallet Wrap, and Dispatch
The final walk-through isn't just a casual glance down the aisle—it's the last line of defense against costly oversights. Every rack is checked against the manifest, cartons counted in their bays, and any stragglers pulled forward so nothing gets left behind on the dock. It's where small catches happen: a wrong label here, a missing pallet tie there, before the shrink wrap goes on and everything becomes a sealed unit.
Pallet wrap is applied with an eye toward stability, not just speed. The first few revolutions lock the load to the pallet, then the film climbs with consistent tension, each pass overlapping the last by half. Corners get an extra pass because that's where tears start. A well-wrapped pallet doesn't just survive the forklift jolt—it keeps box corners crisp and labels scannable all the way to the customer's dock.
Dispatch means the clock is live. Once the wrapped pallet gets its final scan and the door assignment is confirmed, the paperwork follows the freight, not the other way around. We don't sign off until the truck is loaded, the seal number is recorded, and the driver has a copy of the BOL in hand. That handoff—from our floor to their trailer—is where the process earns its keep.
FAQ
An IBC usually pairs a high-density polyethylene inner container with a galvanized steel cage and a welded base. HDPE offers broad chemical compatibility and impact resistance, while the galvanized frame adds stacking strength and shields the bottle from forklift bumps and rough transit.
Heated HDPE resin is extruded into a hollow parison that gets clamped inside a mold. Compressed air then expands the plastic against the mold walls. If the melt temperature or mold cooling isn’t tightly controlled, you end up with uneven wall thickness, surface blemishes, or stress points that can crack under load.
Inspectors measure the cage’s diagonal dimensions to confirm it’s square, check weld penetration and spatter, and verify galvanized coating thickness. Any cage that’s out of tolerance can squeeze the plastic bottle or throw off pallet alignment.
Most plants run a pneumatic test where the bottle is pressurized with air and monitored for pressure drop, often while submerged or sprayed with soap solution. Valves, gaskets, and the fill opening get special attention because those are the most common leak points.
They submit the design to a series of performance tests: drop tests from specified heights, stacking tests with full load, vibration tests, and hydraulic pressure tests. A certified third party or in-house lab signs off, and the final tank carries the UN marking plus the test data.
A thin spot in the bottle wall can become a rupture point when the tank is stacked three high or exposed to aggressive chemicals. Technicians use ultrasonic gauges at multiple points, and some lines also weigh each layer during parison extrusion to catch drifts early.
Robots handle repetitive welding, pallet insertion, and valve assembly at high speed. Humans are better at spotting subtle surface defects, confirming gasket seating, and making final judgment calls on cosmetic flaws that automated cameras might miss or over-report.
Yes. Common options include EPDM or Viton gaskets for aggressive solvents, larger or angled valve outlets, static-dissipative bottles, heating pads, and special venting. Some facilities also add RFID tags or color-coded fittings to prevent cross-contamination in plants that handle multiple fluids.
Conclusion
At the IBC tank factory, the process starts long before any molding begins. Bulk polymer arrives in sealed tankers and is pneumatically unloaded into dedicated silos, where moisture levels are pulled down to a fraction of a percent before the material even reaches the production floor. Incoming resin batches undergo a series of first checks—melt flow index, contamination screening, and color consistency—so that only dry, spec-compliant granules make it to the extrusion blow molders. Inside each molding cell, the real choreography unfolds: a parison is extruded, inflated under precise air pressure, and cooled within a split-second window that determines wall thickness and structural integrity. Once the tank body emerges, automated assembly takes over. Robots align frames, cages, and valve fittings with tight tolerances, while operators monitor jigs and torque settings in real time, catching subtle misalignments that machines alone might overlook.
Before any unit goes to paint, it faces leak testing and load simulation. Tanks are pressurized with air or water and checked for pinhole-sized leaks, then subjected to hydrostatic loads and top-load compression that mimic years of stacking and sloshing during transport. The lab then runs a stress menu that goes well beyond the production line: chemical compatibility tests immerse samples in aggressive fluids, UV chambers accelerate years of sun exposure, and drop tests from specified heights confirm impact resistance at low temperatures. Finally, every finished tank gets a walk-through inspection—fitting torque, cage weld integrity, valve operation—before being pallet-wrapped and dispatched with batch traceability data linking it back to the original polymer delivery. It is a sequence where each stage depends on the one before it, and no shortcut survives the paperwork.
Contact Us
Contact Person: Ada Xu
Email: [email protected]
Tel/WhatsApp: 0577-86806088
Website: https://www.dayuwz.com/